Get razor sharp macro shots with a system camera and a couple of gadgets. The tehcnique is called focus stacking.
The insect photos shown here are not taken using traditional methods. Almost everything is in focus; from the tip of the antenna, through their facet eyes to their neck hairs. This kind of sharpness and depth of field is practically impossible to obtain with classical photographic techniques.

However, the optical limitations may be bypassed with appropriate software and a considerable amount of patience. The technique I am using is called focus stacking. It describes the process of combining the sharpest parts of a number of individual exposures into a new, ultra-sharp image.
I take several pictures of the same motive, while pushing the object (the fly in this instance) a few hundreths of a millimeter away from the camera between each exposure. Thus I’m left with a stack of images where different parts of the object is in focus.
Extending the depth of field for a single image by moving the focal plane is not a new concept. In fact, the Dynaphot photographic system, an analogue predecessor to focus stacking, was patented back in the sixties. This film-based variant uses a very narrow strip of light, illuminating the object at the focal plane only. The object is moved through the light strip during exposure, leaving the unsharp parts in darkness. Rik Littlefield has written a brief history of focus stacking in case you want more background information.
Our digital method replaces the light strip with advanced algorithms to insulate the sharpest areas of the motive from a set of single exposures. Several software packages can do this. Photoshop is capable of doing it out-of-the-box, but specialized applications like Zerene Stacker and Helicon Focus are user-friendly and have more options for fine-tuning the result.
The website www.photomacrography.net is a real nice source of inspiration. I’ve collected lots of useful information from there.
Forget about regular camera lenses
Most common close-up objectives are usually not built for reproductions larger than actual size. If you want to go beyond 1:1, you would be better off getting a suitable lens.
Vendors like Carl Zeiss, Leica, Minolta and Nikon used to make special-purpose photomacrograpy lenses. These lenses are very popular on the used market. Many of them are intended for bellows attachment, and are often sold for several hundred dollars on eBay.
However, macro enthusiasts have tested a number of lenses, some of them quite inexpensive because they are made for other purposes than close-up photograpy. The good news is that some of the cheap lenses turn out to be fantastic for photomacrograpy!
A nice example is lenses made for enlargers used in the darkroom for enlarging images from film onto photo paper. These lenses are generally easy to find on eBay, and they don’t cost you a fortune.
For the images shown here, I used a relatively cheap enlarger lens, purchased on eBay for about $100. The photomacrograpy enthusiast Johan J. Ingles-Le Nobel, the creator of the website extreme-macro.co.uk refers to my lens as his favorite.
To obtain the best image quality, enlarger leses must be mounted backward (in reversed position) on the camera, such that the front element is closest to the image sensor.
Before purchasing a lens, you should check that it is suitable for photomacrograpy. Some enlarger lenses do not work as macro lenses at all. Search for recommendations, for example here, here or here.
I needed special adapters to mount the enlarger lens reversed on my camera body. Jose at www.customphototools.com fixed it in a matter of days.
For flexibility, I use a bellows focusing attachment between my camera and the enlarger lens. Allthough this is not strictly necessary, the bellows provides a convenient way to adjust the enlargement. All it does is increasing or decreasing the distance between the lens and the camera, which affects the reproduction ratio.
Be warned that aberration and other optical errors also get enlarged along with your motive. If you increase the lens-to-camera distance, you may notice a considerable loss of quality once the enlargement exceeds the lens’ capabilities.
If extending the bellows no longer increases the level of details in the image, you have what is called «empty enlargement». The image looks blurry or out of focus.
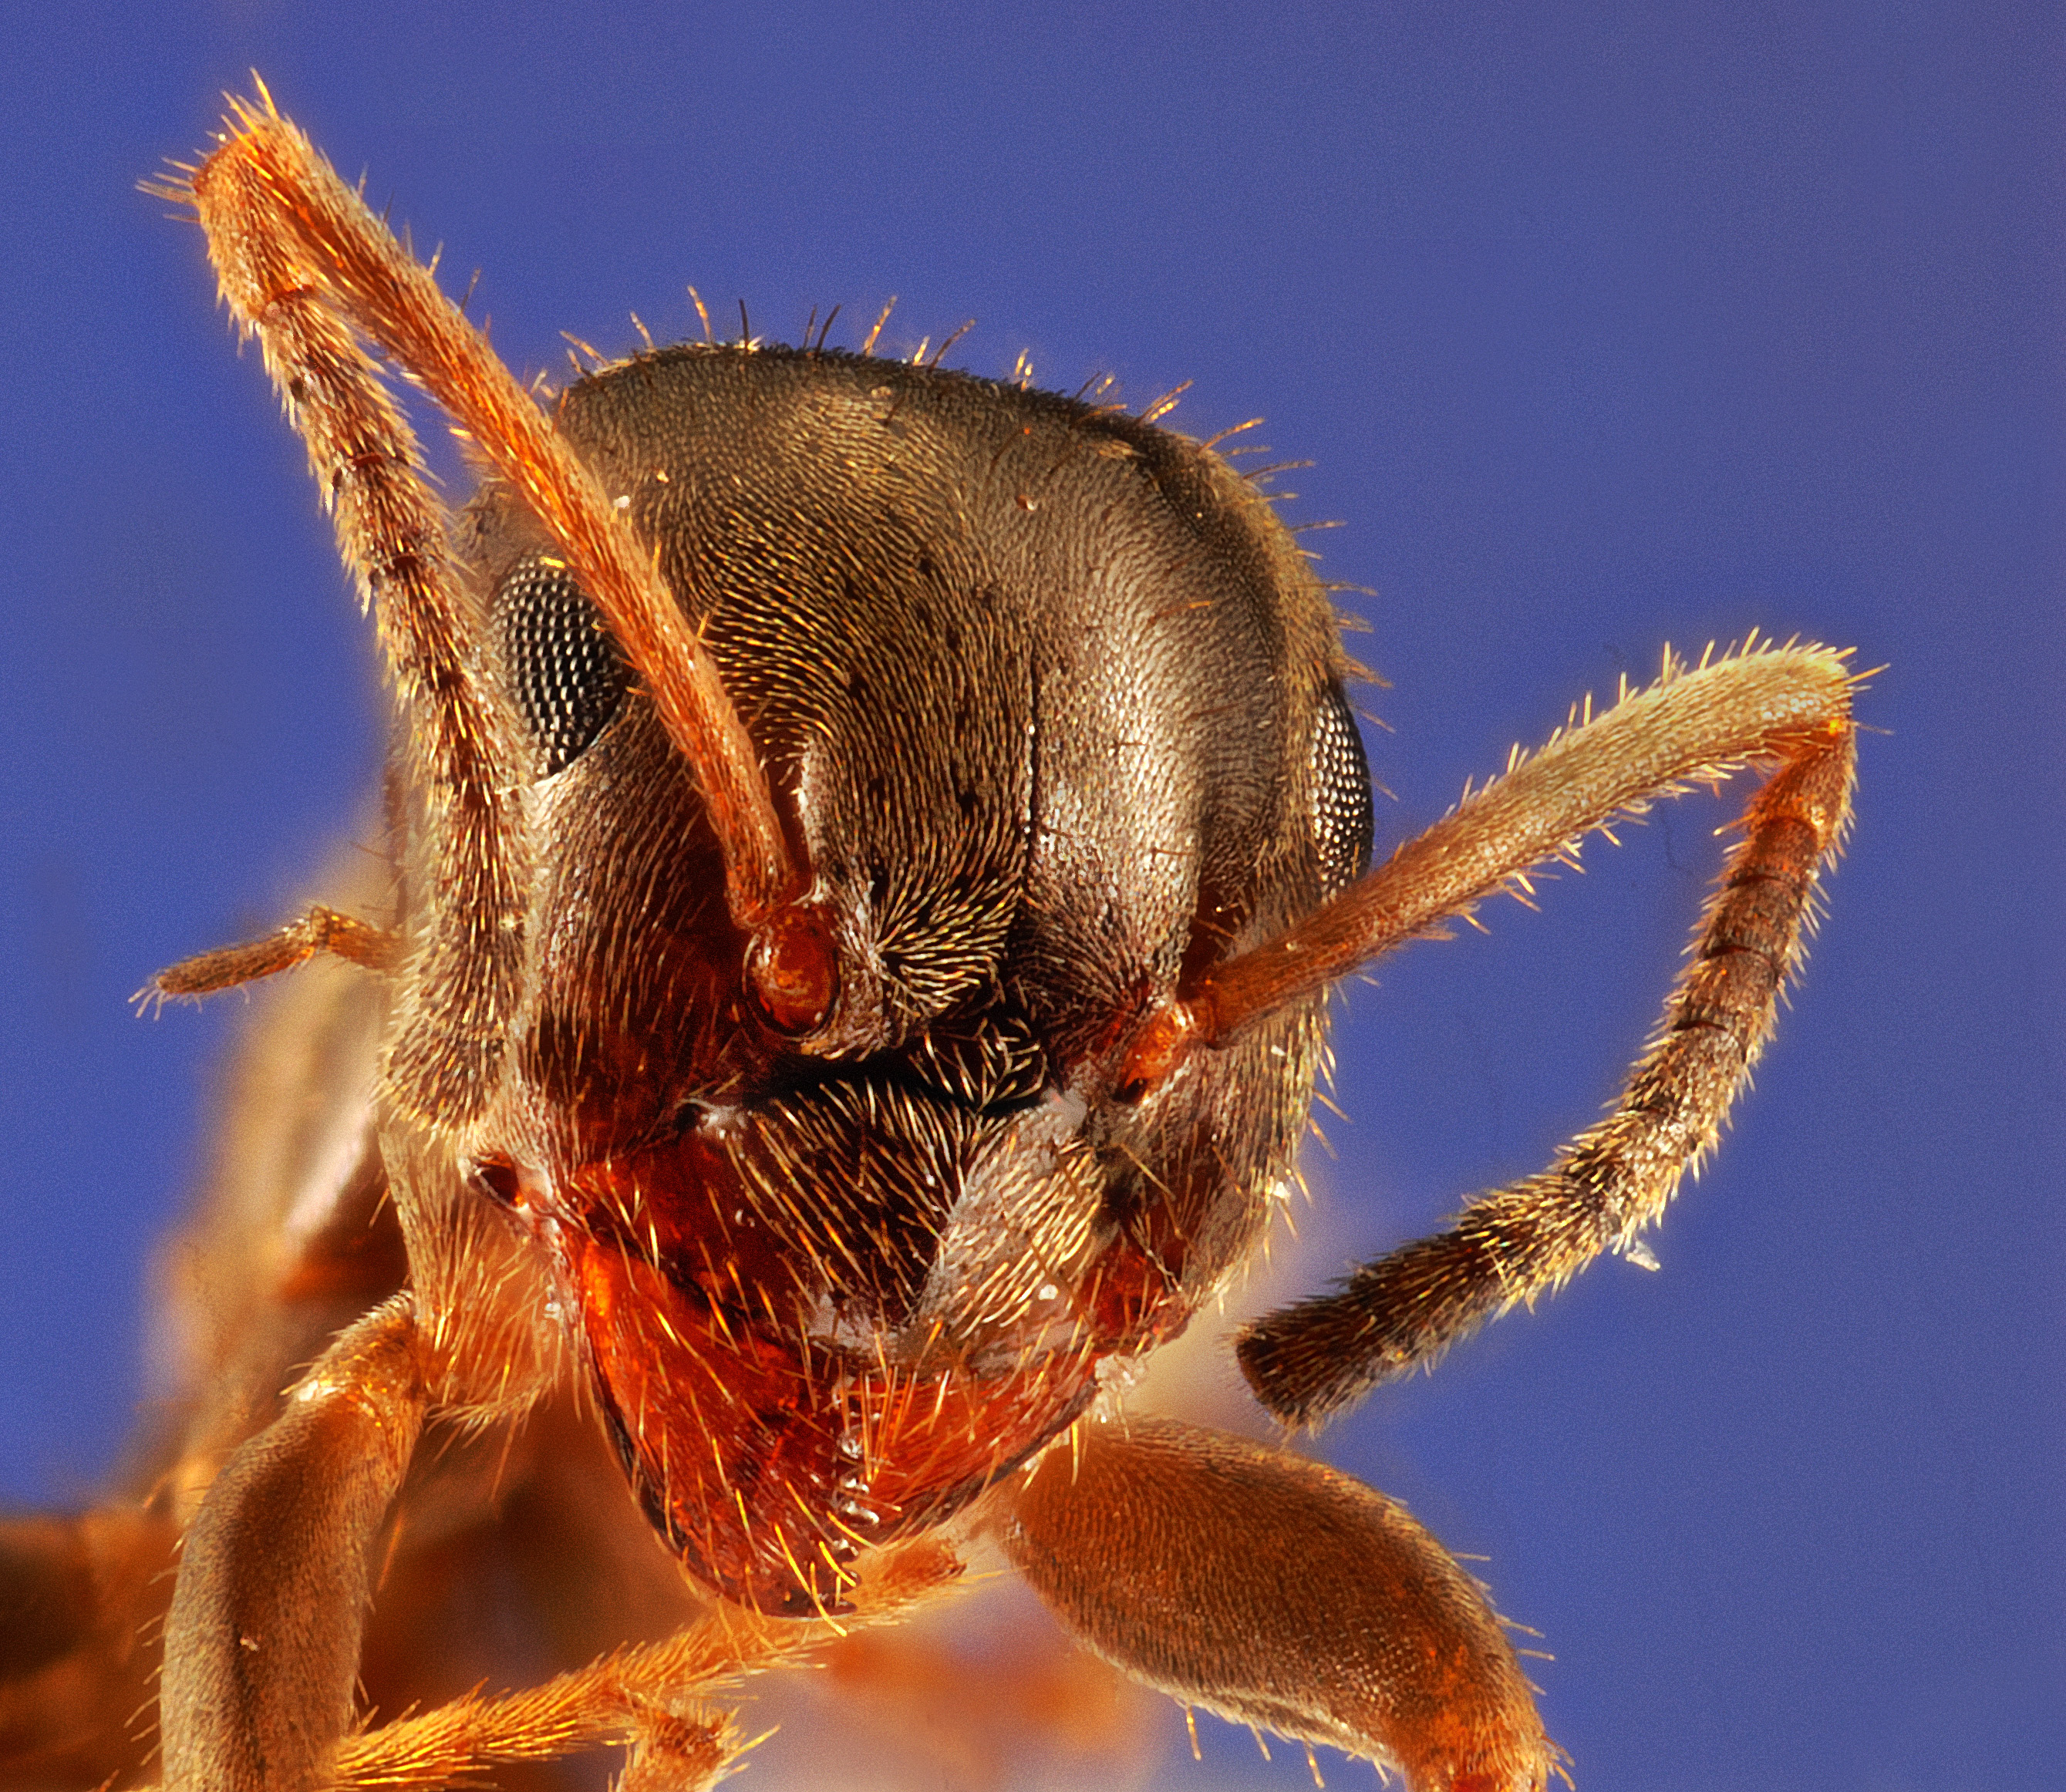
The above image of an ant is enlarged about 6,5 times. The bellows is extended almost to its full length, and that has affected the image sharpness.
As mentioned earlier, the bellows is not required. The enlarger lens may be put directly on the camera body, or you can add standard extension rings if you want greater enlargement.
0.02mm accuracy
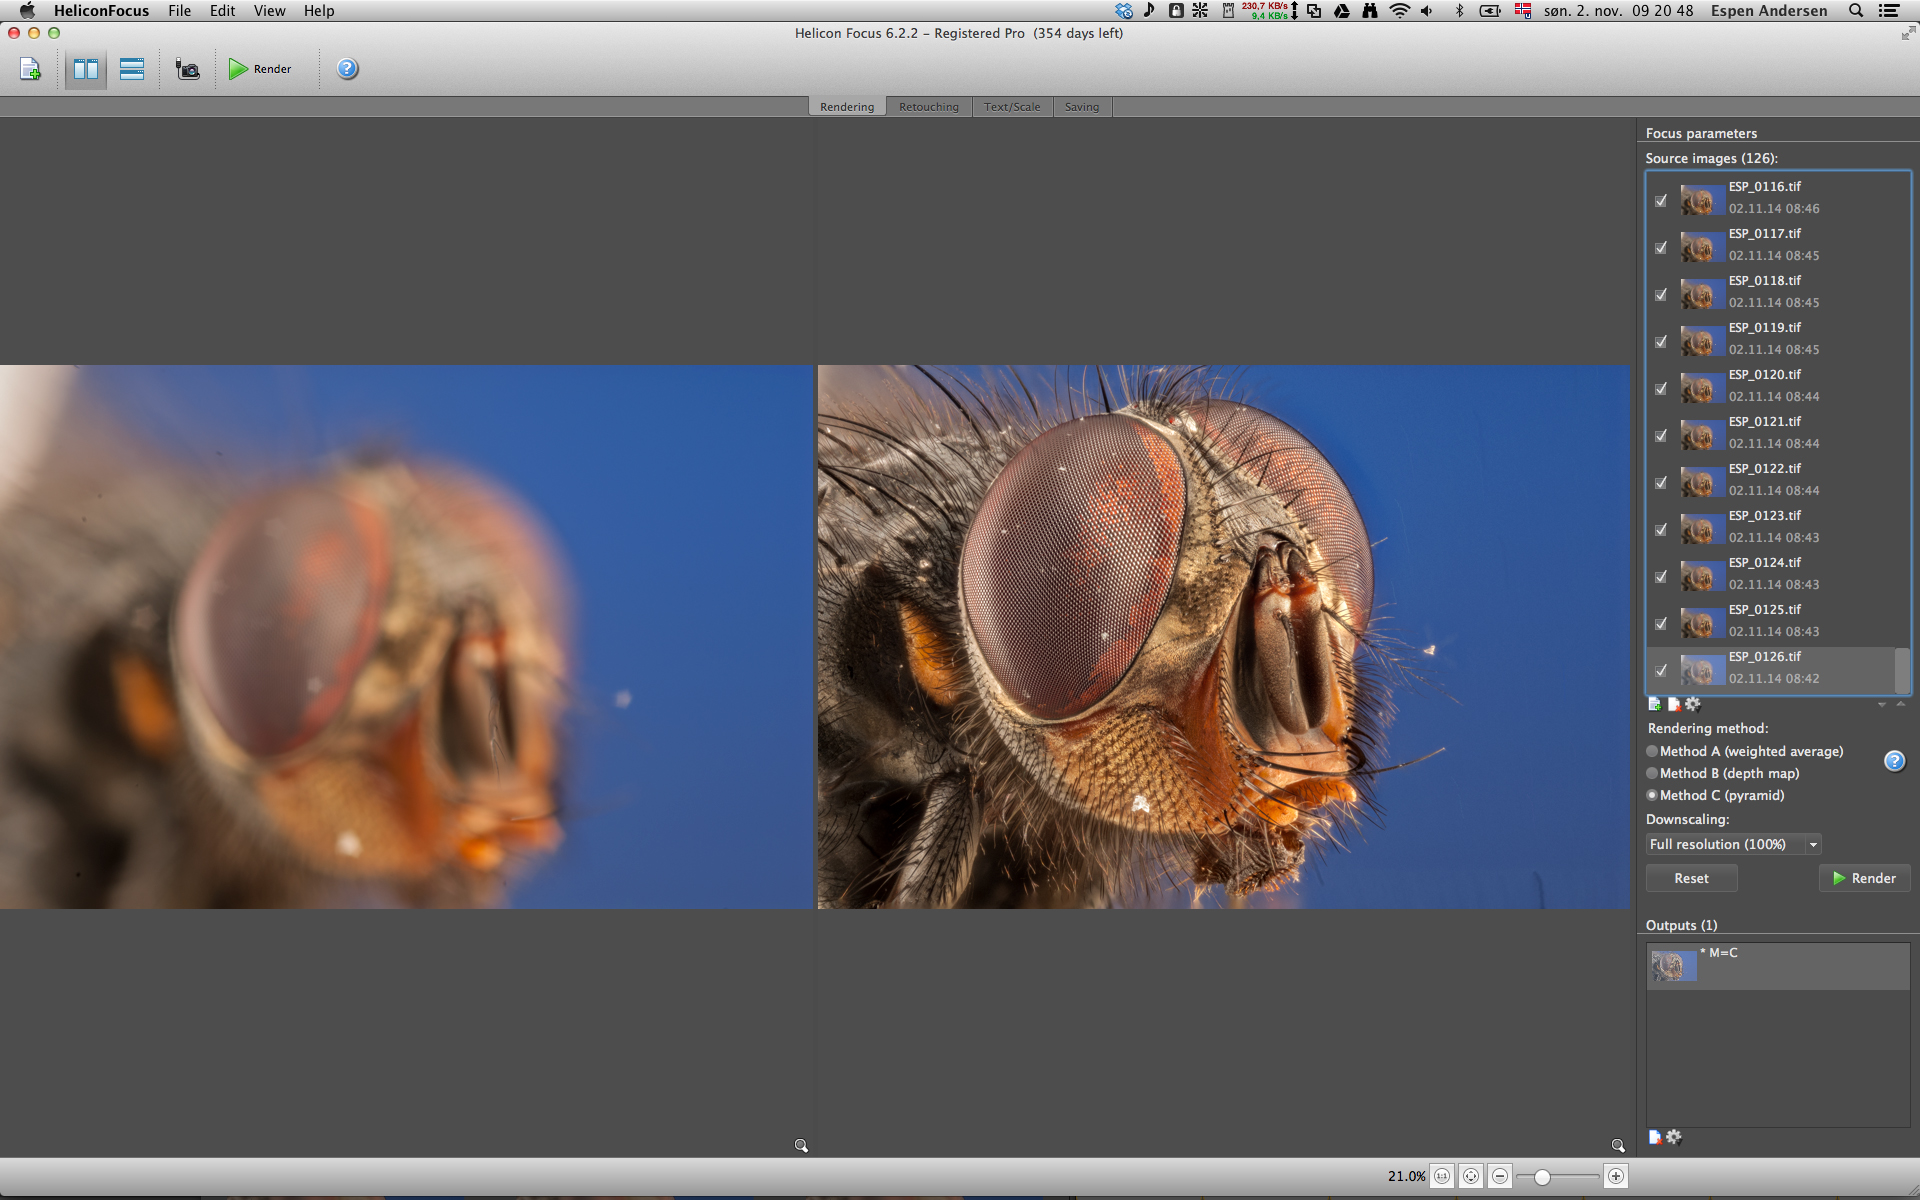
One of the most important aspects of macro focus stacking, is precision. The top image of the fly is based upon this stack of 125 single exposures. Between each shot, the insect is pushed 0.02 mm away from the camera. Thus, the focal plane on the current shot falls two hundreths of a millimeter ahead compared to the previous shot.
It goes without saying: You will certainly need some kind of aid to handle such small displacements.
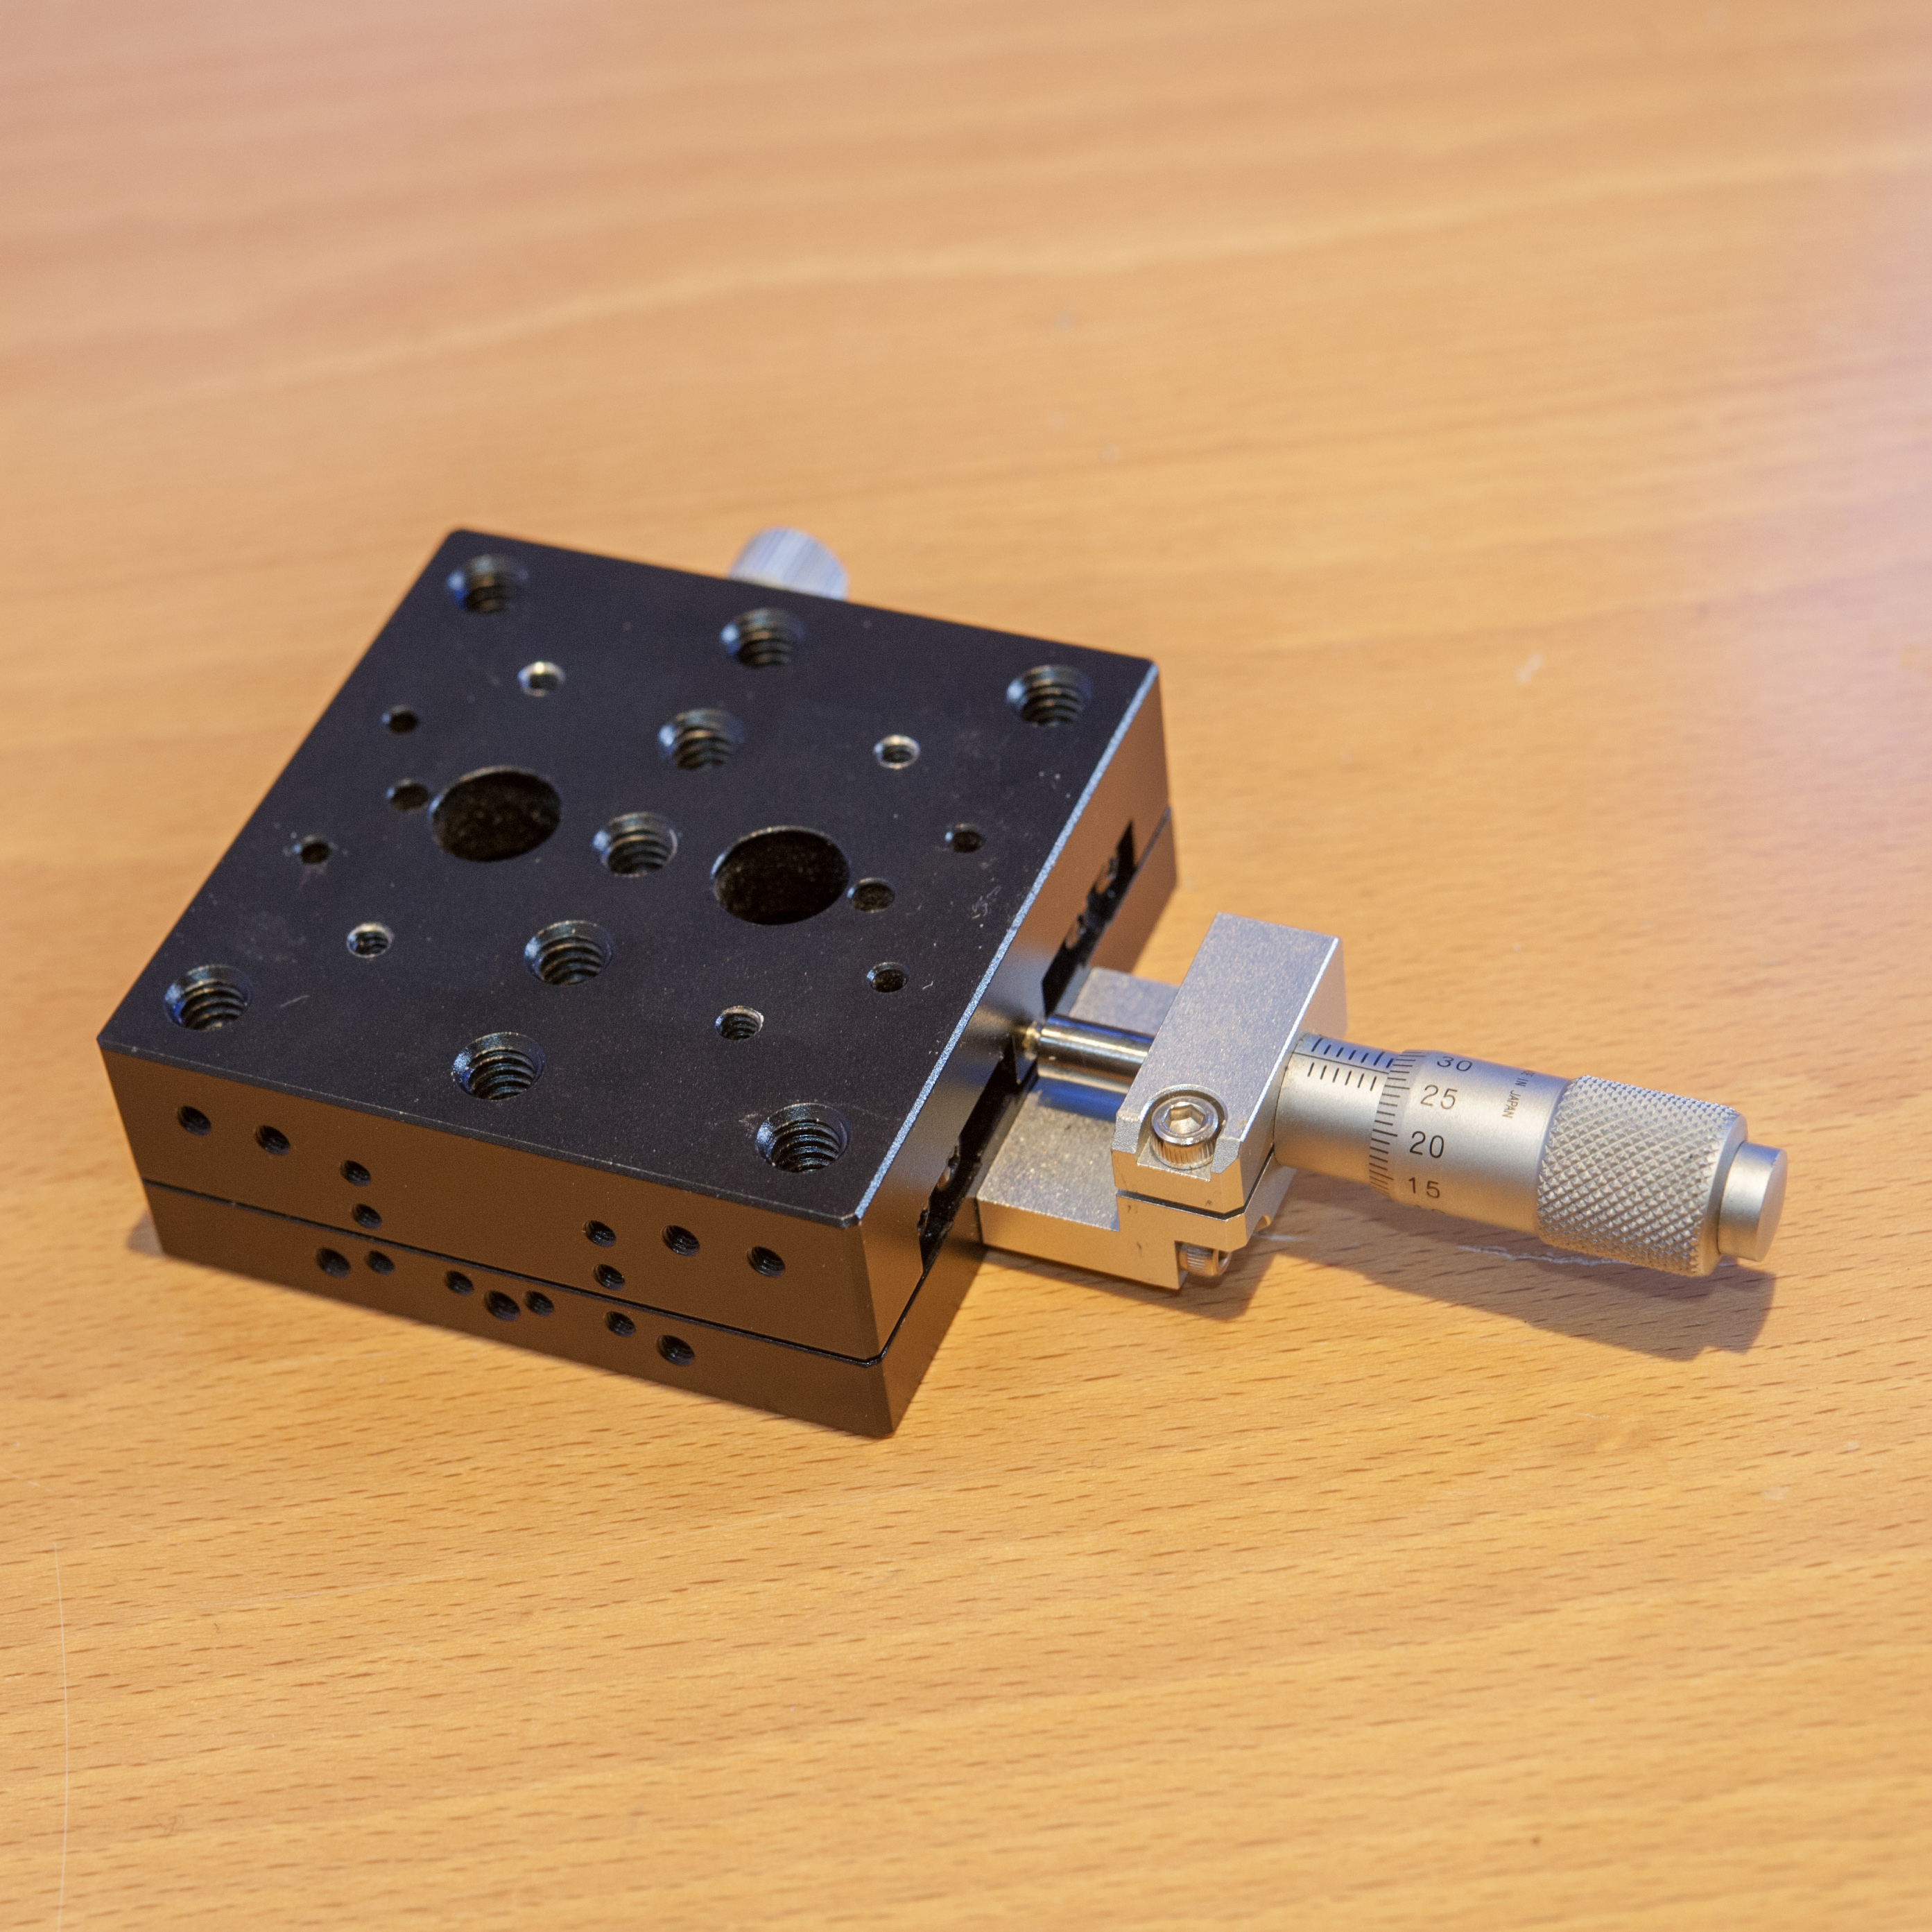
Besides finding a stable workbench, i aquired a Melles Griot Linear Translation Stage for $70 on eBay. This mechanical device is intended for mounting on an optical bench, and has a square mounting plate (stage) with screw holes and a micrometer.
The stage can be moved forth and back steplessly in one direction. The micrometer scale has a 0.01mm resolution. Perfect for my needs.
The same result can be obtained by moving the camera instead of the object. However, for motives larger than a peanut — when using a regular photographic lens — turning the focusing ring instead of physically moving the object or camera is the better choice.
The camera and flash gun(s) should all be set in manual mode. Every image in the stack should have the same exposure, so forget your camera’s program setting. Use the histogram and do a bit of trial and failure to get the exposure right before starting to «scan» the motive.

My rig consists of camera with bellows focusing attachment, mounted on a tripod. Four laboratory stands on the workbench hold the focus light — a powerful LED flashlight — and three macro flashes.
A heavy iron vise holds the Melles Griot-stage stable. The motive (the fly) is attached to a needle and placed upon the stage.
I use whatever lies around in the house. The most important issue is that the rig is stable enough to give a consistent result. Many enthusiasts have published images of their macro rig, for example here, here and here.
Light quality
Flash is required when getting as close to the motives as here. Firstly, a lot of light is needed when using bellows or extension rings. Secondly, the brief blink of the flash eliminates motion blur.
My setup includes two macro flashes directed towards the object and a third flash pointing towards the background — a white reflector plate — with a gelatine color filter to get the blue background.
You will be just fine using a regular flash unit as well. The only requirement is that the output power should be manually adjustable — preferable in 1/3 EV stops.
Good light quality is paramount for a successful result. Directing the flash guns directly towards the motive is hardly a good idea. I reduce the contrast of the images by softening the light. A so-called light tent is the key to getting a flattering light with no burnouts in the highlights and still lots of details in the shadows.
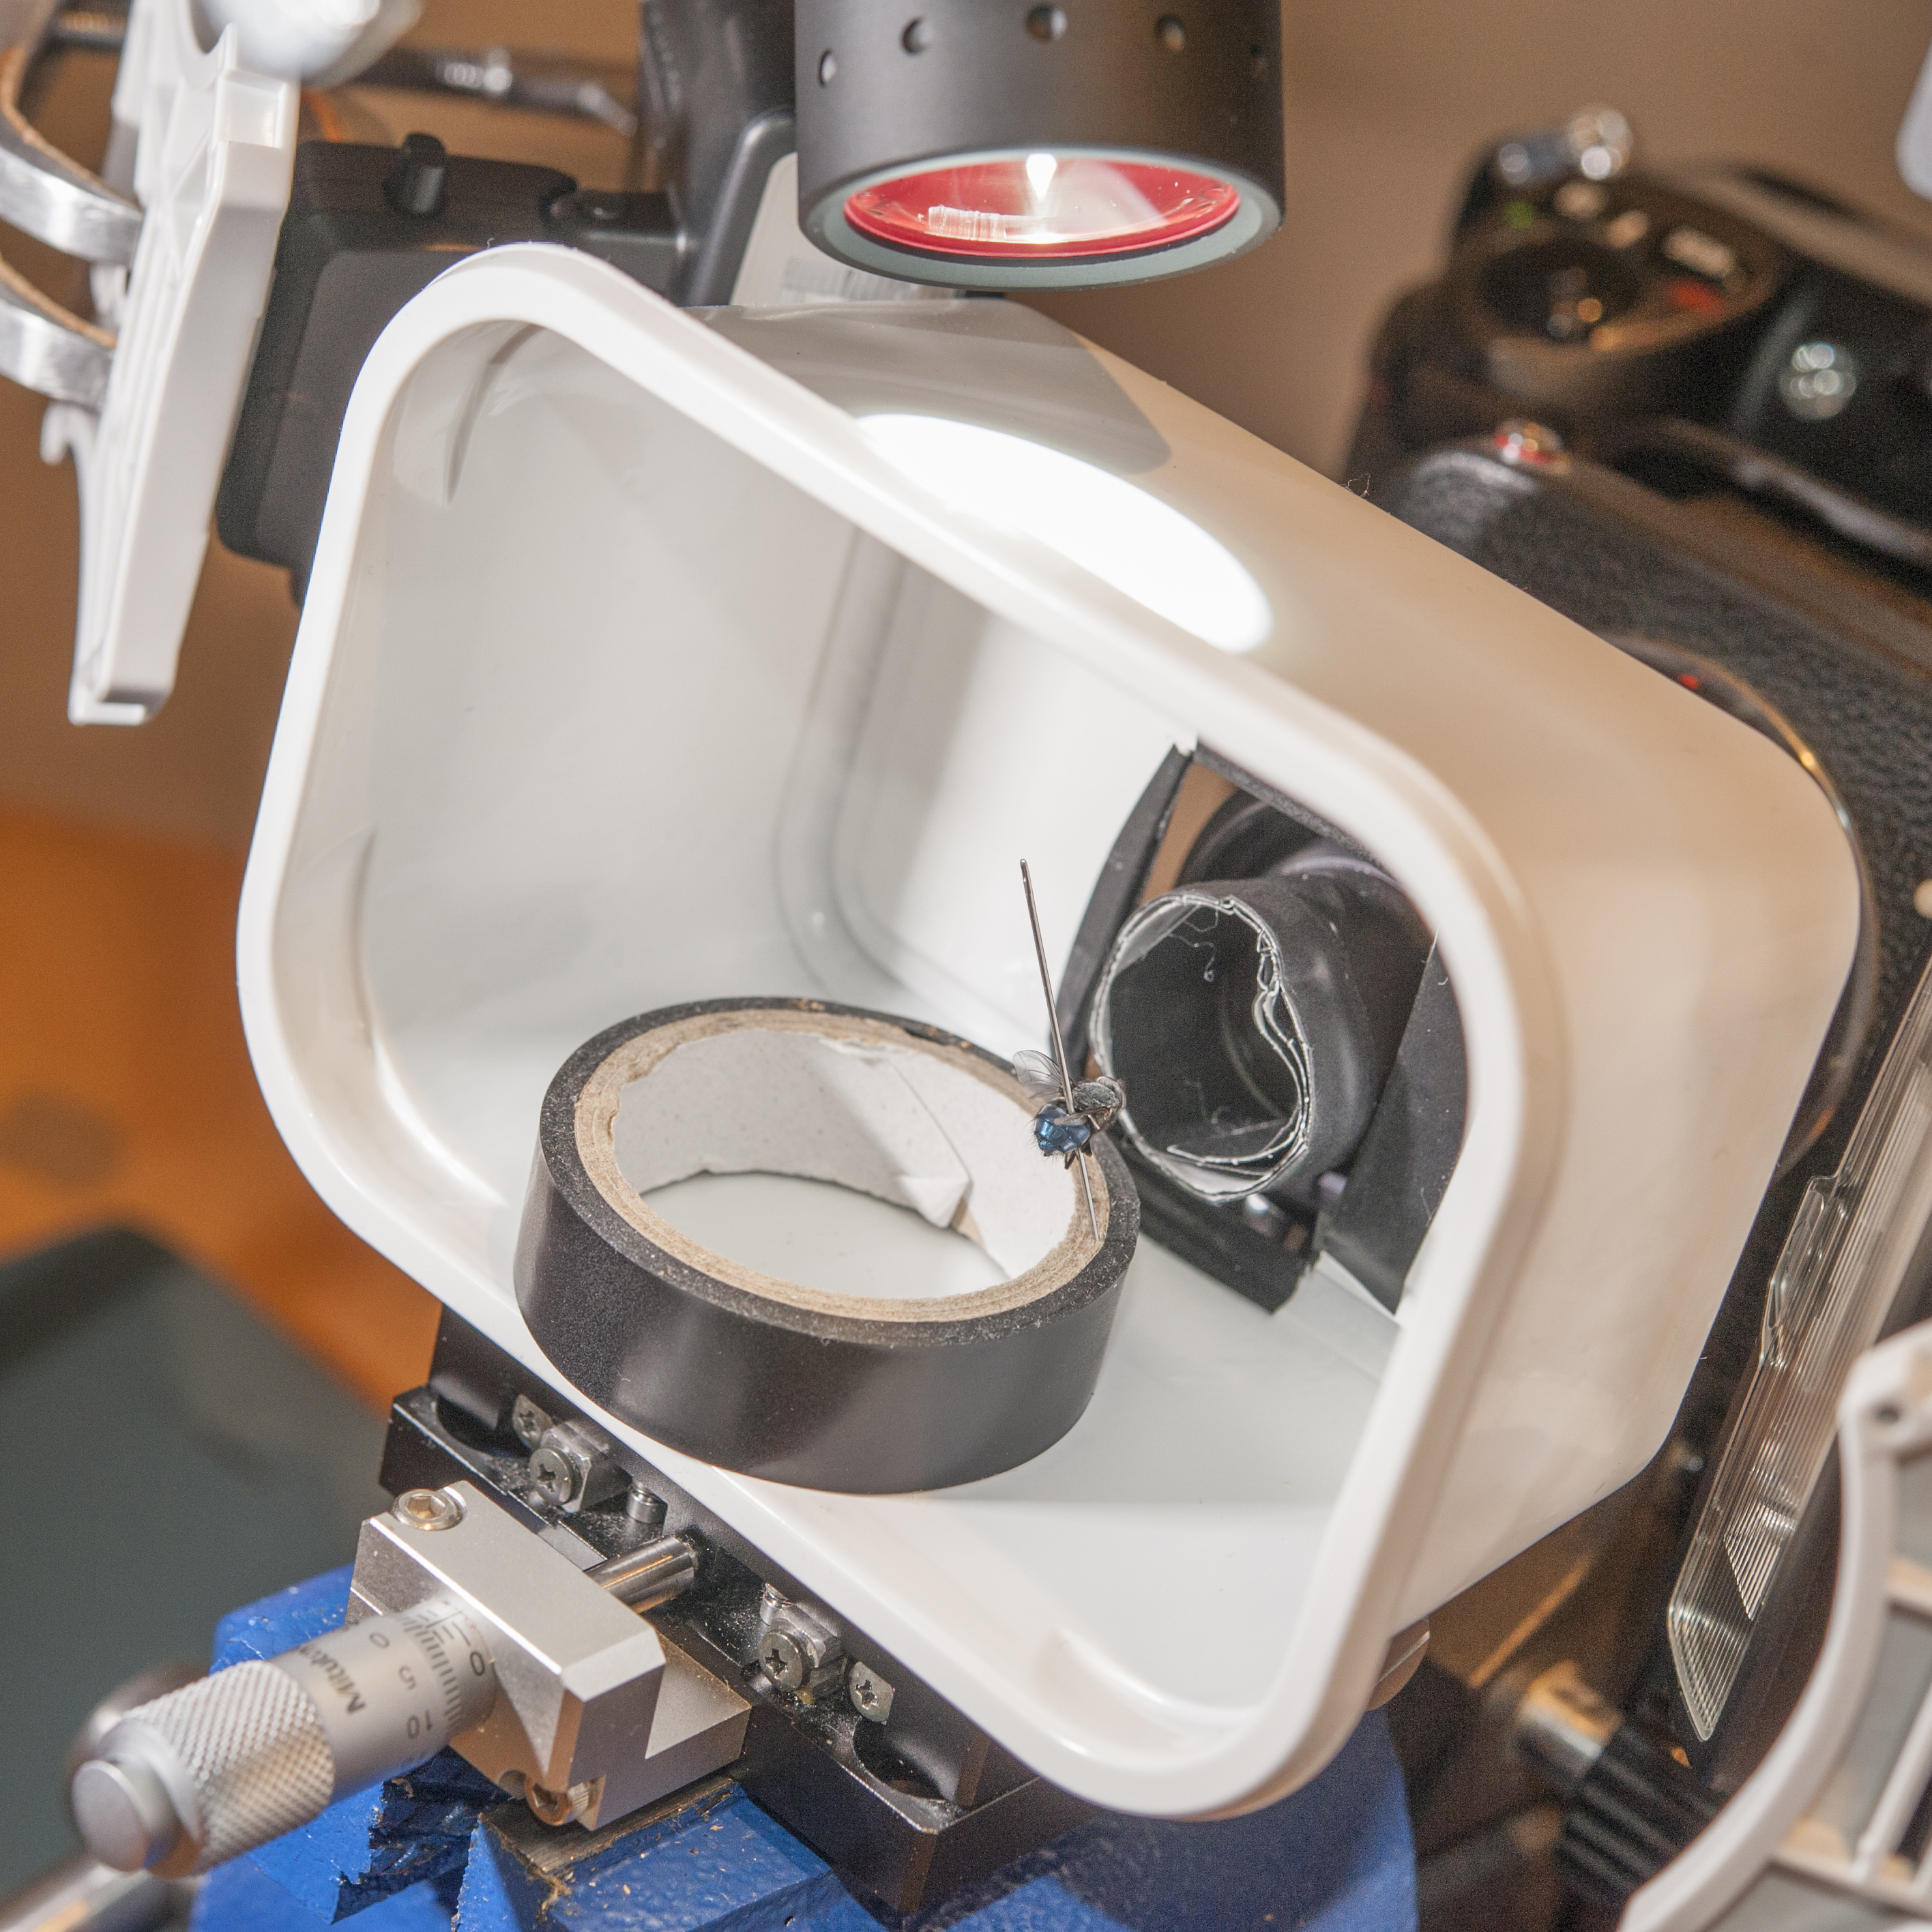
In my example, I use a white plastic box. The object is placed inside the box, and the flash guns point towards the the front of the box. This produces an extremely soft light, suitable for these kind of motives.
To reduce lens flare and improve image contrast, I have attached an improvised lens hood to the tip of the enlarger lens (around the rear element, since it is reverse mounted). The hood is made from a bit of paper and black PVC tape and works like a charm.
When the motive looks good in the viewfinder, and the right exposure is found, the cumbersome process of actually shooting all the images for the stack may begin.
Tongue-in-cheek
I start by setting the Melles Griot stage to zero, then focusing on the backmost detail I want to be in focus. Next, I turn the micrometer until the foremost detail is in focus. I can then see on the micrometer scale how far I have to go to cover the required focus area.
I then turn the micrometer back to zero and perform a last check before starting taking the pictures. The camera is triggered via cable release to reduce vibrations. From now on, it is very important not to bump into the rig while shooting the stack images. Between each shot, I advance the micrometer 0.02mm, make sure my hand doesn’t get in the way, wait until the flash guns have recycled before triggering the camera. Even the slightest movement may disturb and ruin the image sequence, so stay focused (literally)!
Make sure your camera and flash batteries are fresh and ready to sustain through the whole sequence. Realizing that one of the batteries should have to be replaced half-way through is annoying — to say the least. By changing the batteries, you run a risk of bumping the rig out of position.
Upon reaching the end of the sequence (plus a couple of extra shots, just in case), the fun part starts. The stack images are loaded into the stacking software, in my example, Helicon Focus.
Usually, I have to experiment with different settings and algorithms to obtain a optimal result. Some amount of post processing is always required. Sometimes the stacking software makes mistakes that are easily amended in Photoshop.
Dust on the image sensor — and even on the lens — become visible as scattered spots in the stacked image. These are easily removed with Photoshop’s spot healing brush, or with the clone stamp tool.
In some stacking applications (like Helicon) you can load a dust map before doing the stacking. The dust map is a empty exposure against a white background, where only the dust particles are visible. The stacking software will then attempt to remove the dust spots as it works its way through the images.